Starfield Star UI Mod Guide: Better Inventory System
Our Starfield Star UI mod guide will improve your inventory system. Here’s the ultimate guide to modding Starfield.
Starfield has divided the gaming community in half. It is also the least successful game of its developer, Bethesda when it comes to the reviews. But whether you love it or hate it, the game has some blatant issues.
One of these is definitely its lackluster inventory. Starfield‘s menus and user interfaces feel long-winded even for the simplest tasks. Fortunately, thanks to the Starfield Star UI mod, you can make it a lot more intuitive.
Starfield Star UI Mod Installation
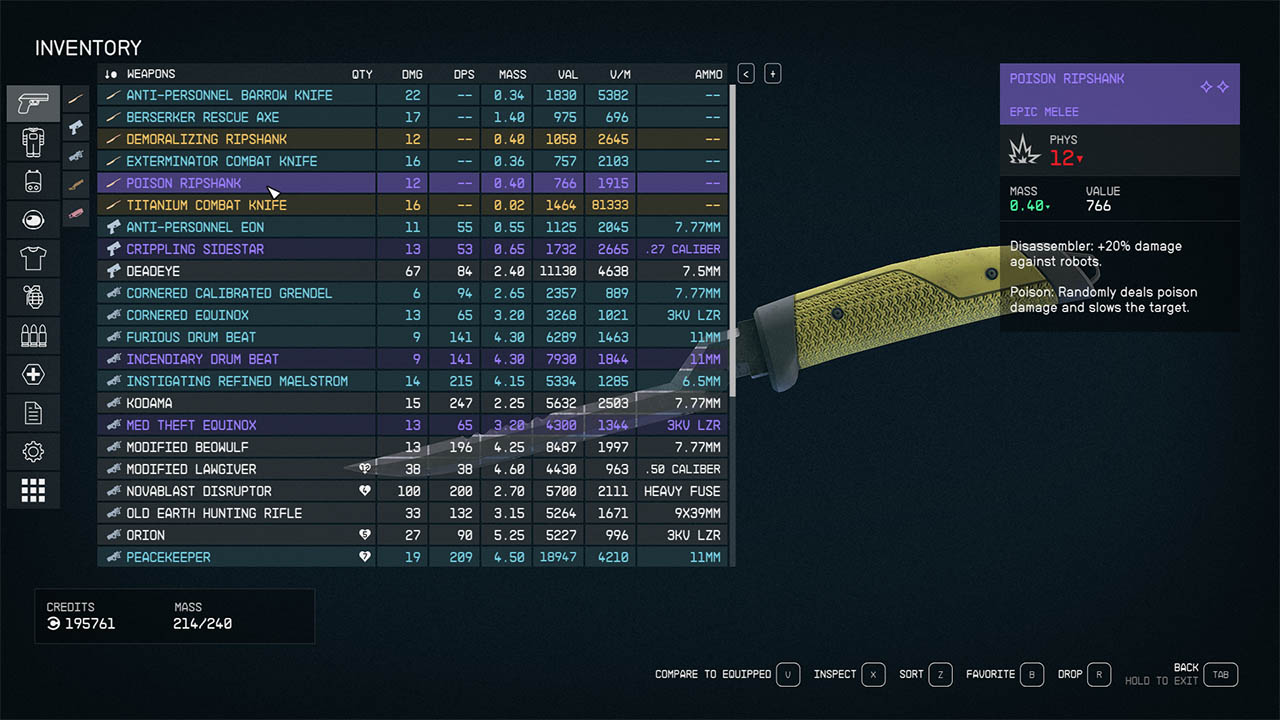
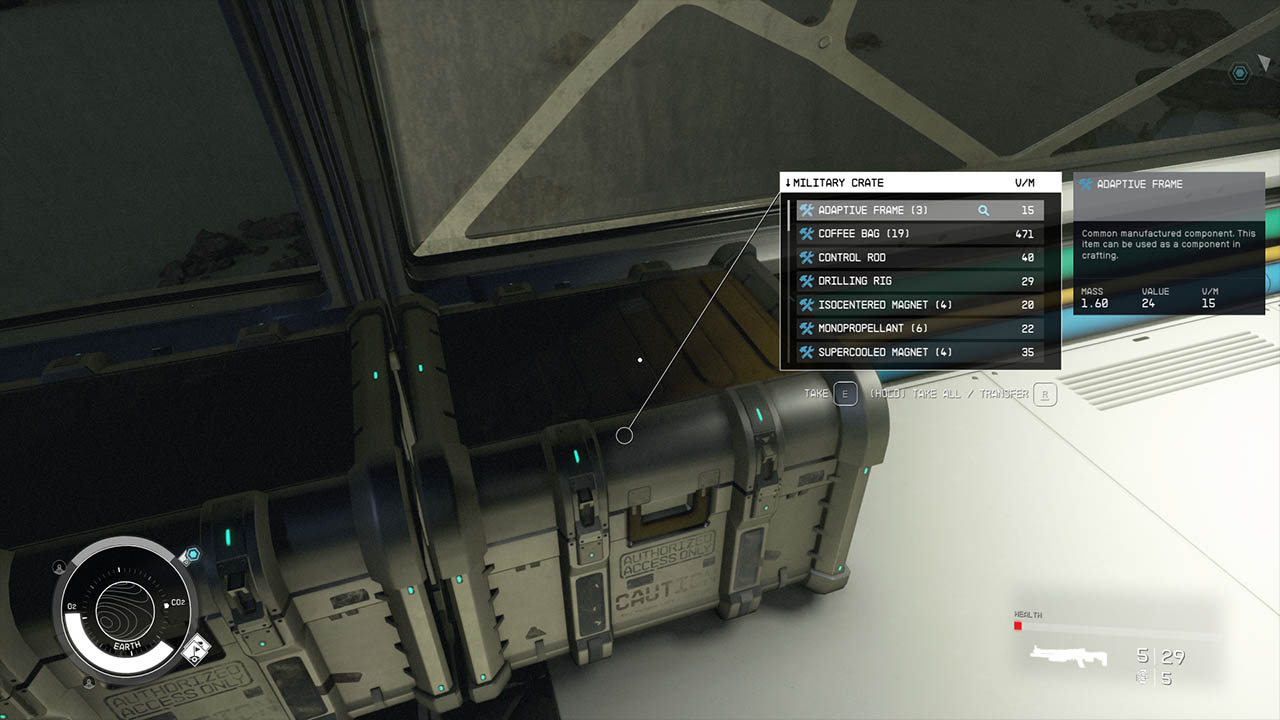
StarUI Inventory is a game-changer for PC players seeking an enhanced inventory management experience in their favorite games. Its compact display style optimizes the screen with more intuitive tabs.
Installing this mod is definitely among the best Starfield tips.
Enable Archive Invalidation (INI settings)
Ensure that Archive Invalidation is enabled in your game’s INI settings. Alternatively, you can manually set the INI values using Windows tools.
- Go to Documents/My Games/Starfield.
- Make sure you started Starfield once.
- Search and find the StarfieldPrefs.ini.
- Open it and add a new section below, called [Archive].
- If there is already a section, add the lines below in this section.
- bInvalidateOlderFiles=1
- sResourceDataDirsFinal=
- Make sure that the second line doesn’t have anything written next to the equal. So there should be nothing behind =.
How to install Starfield Star UI Inventory mod?
Nexus Mods has been the go-to shop for all things modding in the past decade. It offers a plethora of mods for a ton of games as well. As it is the staple of the modding landscape, it also offers a brilliant mod installer called Vortex.
Vortex Mod Manager is the ultimate tool for installing mods for any game. From Skyrim to Cyberpunk 2077, Starfield to Battle For Middle-Earth 2, it is simply the best modding tool ever.
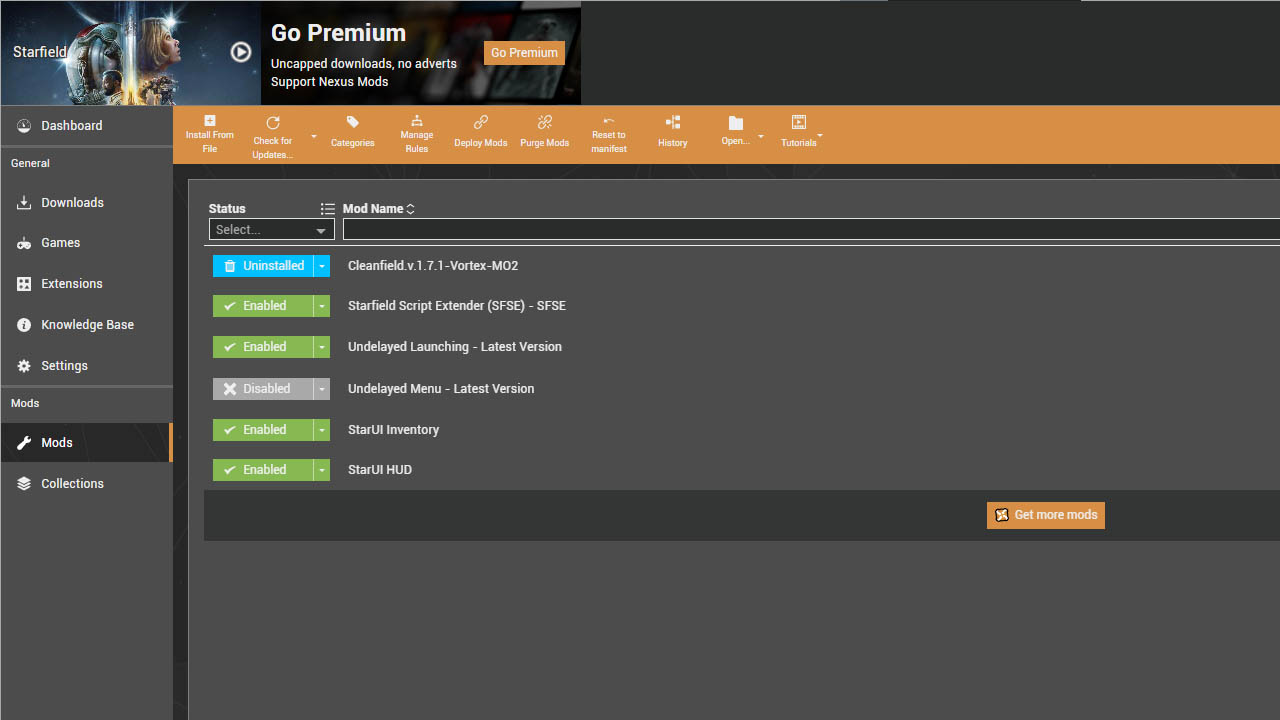
It doesn’t only easily install mods. But also sorts them out to fix possible file conflicts. That’s why we suggest installing Star UI mod to Starfield using Vortex.
Installing Vortex Mod Manager
Here’s how to install Vortex Mod Manager for Starfield.
- To fully utilize Vortex and access mods from Nexus Mods, you need to create an account or log in with your existing Nexus Mods account.
- Visit the official website of Nexus Mods website to download the latest version of the mod manager. Always make sure you download software from reputable sources to avoid malware.
- Once the download is complete, locate the installer file and double-click on it to start the installation process.
- After the installation is complete, you can launch Vortex Mod Manager. You might find a shortcut on your desktop or in the Start menu as well.
- When you first launch Vortex, it will ask you to specify the location of Starfield and its mods. Follow the prompts to set up the mod manager for Starfield.
- Once Vortex is set up and linked to Starfield, simply head to the Star UI mod page and download it from the Main Files tab.
- After you’ve installed mods, you’ll need to enable them in Vortex and configure their load order. Proper load order is essential for ensuring that mods work together without conflicts.
But you can also install manually by following the simple steps below.
Manual Installation of Star UI Mod
If you don’t want a third-party app or a whole new installation process, the manual installation method is for you. Let’s dive in.
-
- Copy the folder “Interface” from the mod’s zip file into your “Starfield\Data” folder. Make sure to ignore the folders “fomod” and “Optional”.
- Note: If the “Starfield\Data” folder doesn’t work for some reason, you can try copying the files to “Documents\My Games\Starfield\Data” (create the “Data” folder if you don’t see it there.)
That’s it, here’s how you can install this mod manually.
Choose FPS Version (Optional):
If you want to use either the 30fps or 120fps version, follow these additional steps after the installation:
-
- After completing the above installation steps, copy the files from the appropriate sub-folder within the “Optional” folder and overwrite the existing ones with the same names.
Presets (Optional): StarUI Inventory offers two presets one with color and one without.
These presets can be found in the “Star UI Inventory Presets” folder. To apply these presets, you have two options:
- Copy the preset of your choice to the “StarUI Interface (default).ini” file.
- If you’ve created your own custom “StarUI Interface.ini” for your specific needs, you can copy the preset into that file instead. This ensures that your presets remain update-proof.
About the Starfield Star UI Mod
The addition of sortable columns grants players a comprehensive overview of their items as well. Similar to The Elder Scrolls V: Skyrim’s SkyUI, you can now facilitate quick and efficient item management in Starfield.
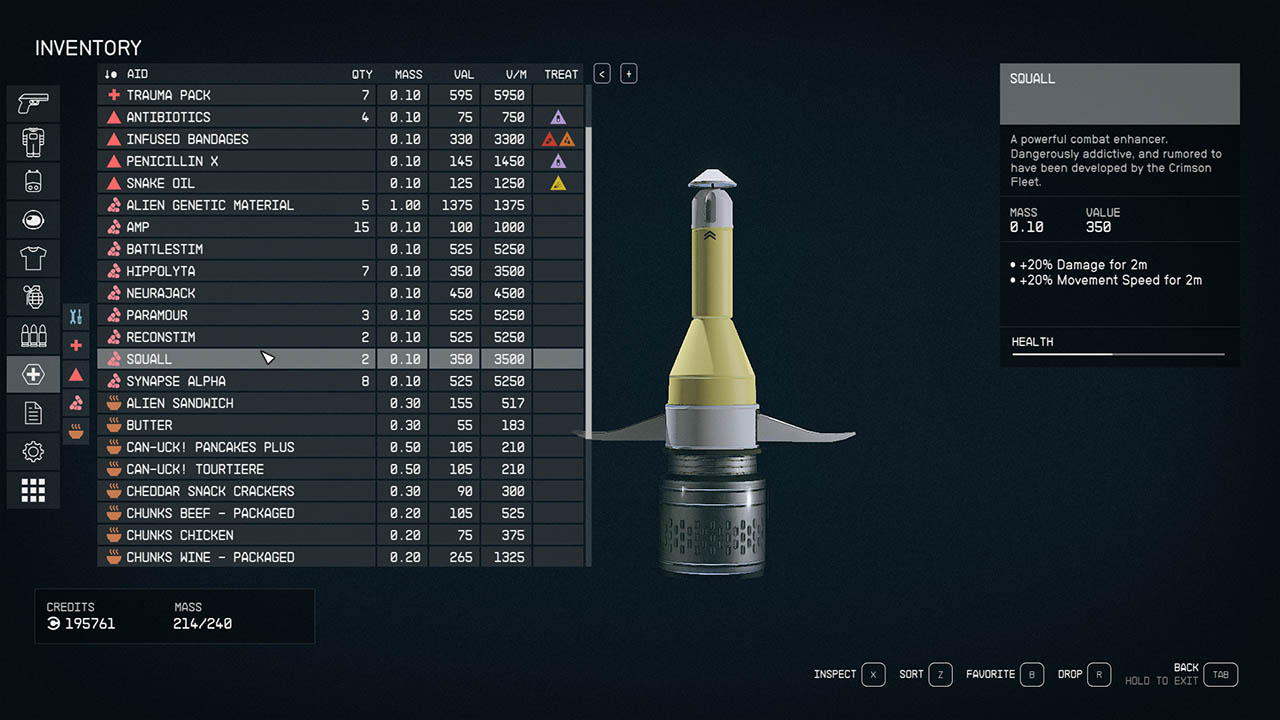
The mod comes with a ton of item tag icons that serve as visual cues. It makes it easier to identify items at a glance too. The left sidebar, complete with categories and subcategories simplifies item organization. This enables you to effortlessly navigate through your possessions.
In short, the StarUI Inventory goes beyond aesthetics and convenience. It is definitely one of the best Starfield mods as well. It elevates the entire inventory system, enhancing the overall gaming experience.
Is Starfield Star UI mod free?
Yes, at the time of this writing, the Star UI Inventory mod for Starfield is completely free. It is unlikely that it will become a paid mod anytime soon. So feel free to install it whenever you want as it is totally free of charge.
How to uninstall the Star UI mod?
Vortex Mod Manager can help you easily uninstall this mod. The mod manager can also resolve possible conflicts that can occur due to residual files.
- Simply open the mod manager and head to the Mods section on the left sidebar.
- The mods you have installed before will appear on this window.
- Select the StarUI Inventory mod on the list and click on the arrow.
- Hit the Uninstall button from the dropdown menu.
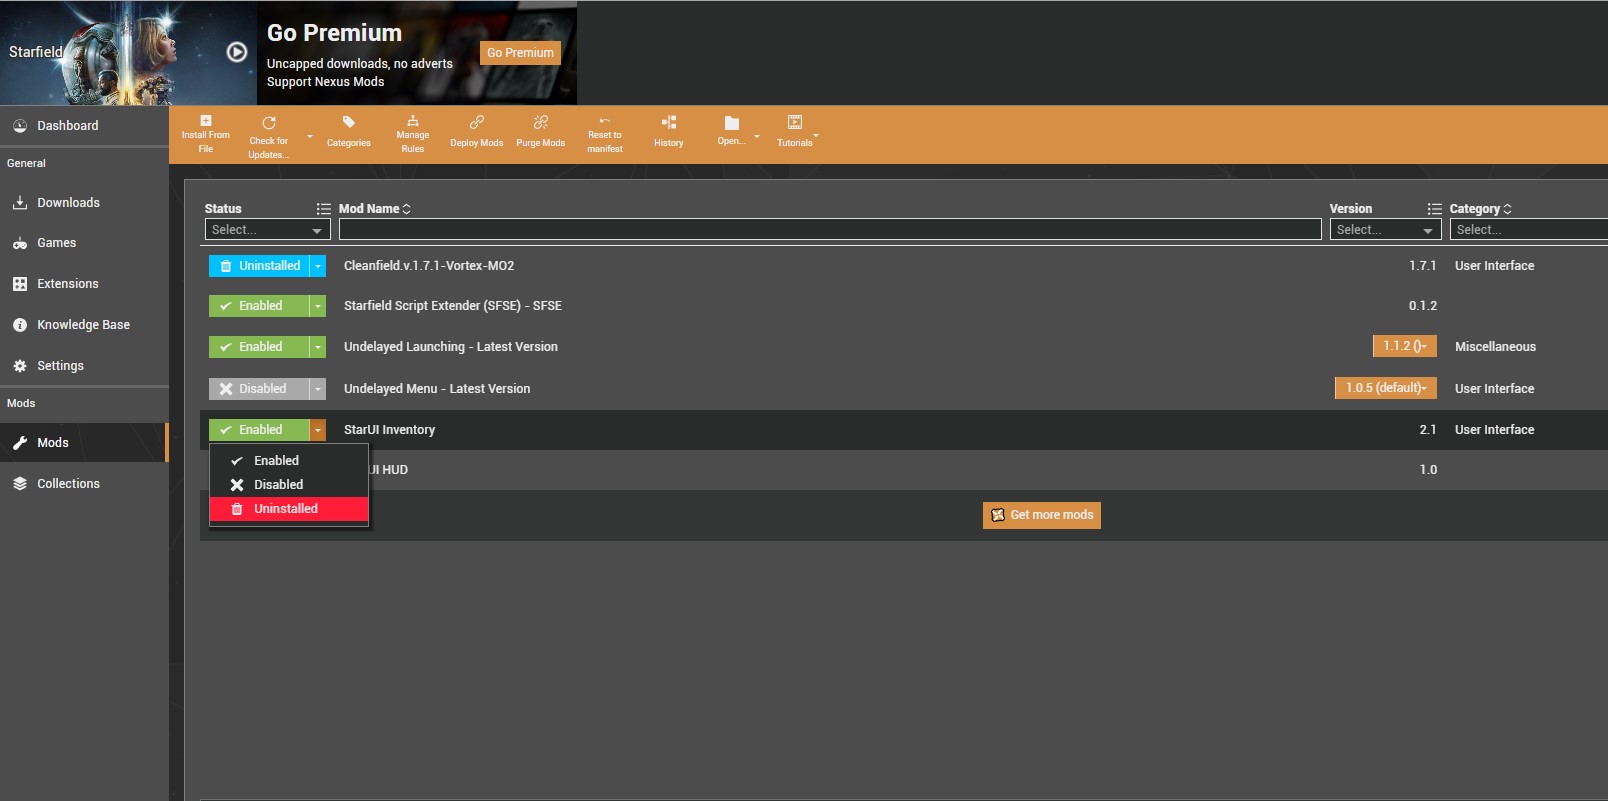
Vortex also allows you to reinstall a mod with a single click. If a mod doesn’t work properly, simply go to the Mods tab and right-click on the mod. If there is a problem with the Star UI, right-click on it and select Reinstall.
The mod manager will then reinstall mod and verify the integrity of the files.
Why is Starfield’s inventory so bad?
Even the staunchest fans of the game and its studio, Bethesda would agree with this statement. Starfield’s inventory tabs and user interface are quite unintuitive.
Pretty much doing anything in the game feels long-winded. Picking up items and then seeing their features is often a chore. That’s why the players are not happy with Starfield’s inventory system.
Fortunately, mods like StarUI and Better Hud are incredibly helpful in enhancing the inventory system. They don’t only expand upon the vanilla, but they also bring new features like item sorting, navigation shortcuts, and more informative tabs.
Ultimately, whether you love or have mixed feelings about Starfield, the Star UI mod offers a practical solution to one of the game’s notable drawbacks. It is solid proof of the modding community’s ability to enhance and refine the gaming experience too.

